
Mapping Network Drive for Course Hosting
Note: for personal web hosting accounts (UHCL) follow this link instead
A mapped network drive is a remote file storage location that "appears" as a local drive on your computer.
To map a drive you will need:
- Your UHCL Credentials
- A computer capable of mapping a network drive. This guide uses a Windows PC.
- Be connected to the UHCL network.If you are using Wifi, then make sure that you connect to UHCL Private network
If you have Any connectivity Issues with Uhcl Network or Home Network Follow the Guide Lines
The most obvious way to connect to the UHCL network is to log on to an on-campus computer. However, the UHCL WiFi network is not considered a part of the UHCL network. Please try to connect to UHCL Private wifi Instead of UHCL public wifi Network.
If you are not on campus, you can still connect to the UHCL network via VPN. The UHCL University Computing and Telecom Department (UCT) has put together detailed information on how to connect via VPN. For VPN Connectivity,Please follow the instructions in the link UHCL VPN All VPN related inquires should be directed to the UCT department.
Mapping a Drive
Step 1
Open up My Computer. On the top of the window click “map network drive”

Step 2
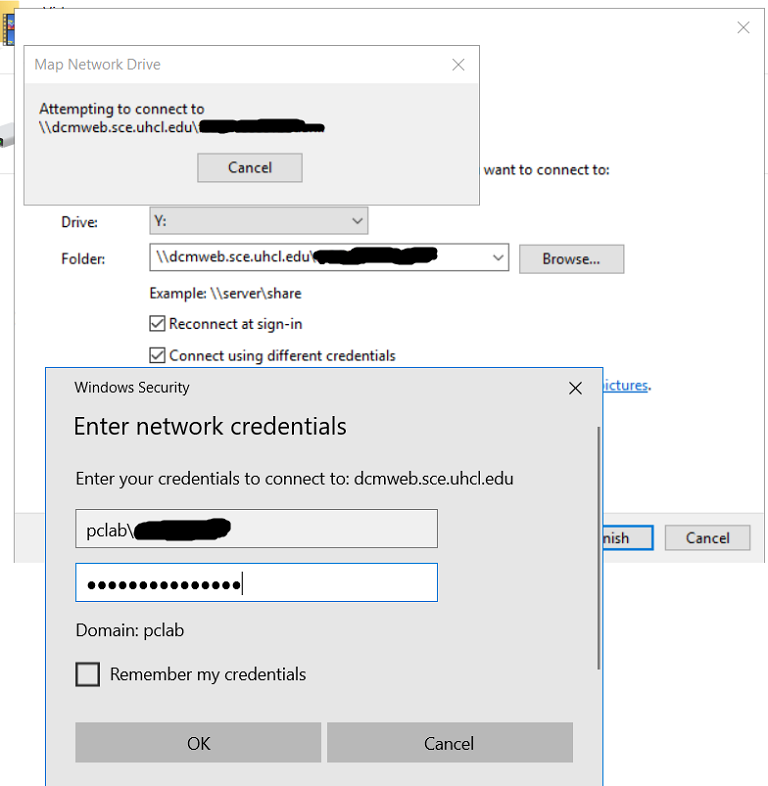
Enter the information as shown in the figure below.
Substitute "your_course_share_name" to the course account folder name provided to you by the instructor.
Make sure to select 'Connect using different credentials'.
This option opens prompt to enter PCLAB credentials.

Step 3
Enter your PCLAB credentials.
You can also choose “Use another account” if you wish to login with a group account (if assigned).
Step 4
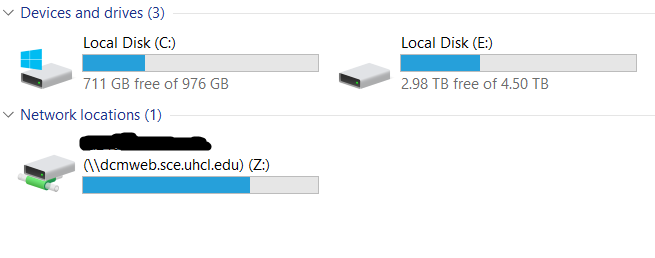
Once done, your mapped network drive will appear in your “My computer” as an attached drive and is ready to you for adding and deleting files.
Troubleshooting
If you are having trouble mapping the drive, check some general issues and their solutions on this page.