|
IDE stands for Integrated Development Environment. IDE consists of a source code editor, a compiler and/or interpreter, build-automation tools, and a debugger. Following are some popular IDEs: |
|
Microsoft Visual C++ (also known as MSVC) is an Integrated development environment (IDE) product engineered by Microsoft for the C, C++, and C++/CLI programming languages. It has tools for developing and debugging C++ code, especially that written for the Microsoft Windows API, the DirectX API, and the Microsoft .NET Framework. |
|
Bloodshed Dev-C++ is a full-featured Integrated Development Environment (IDE) for the C/C++ programming language. It uses Mingw port of GCC (GNU Compiler Collection) as it's compiler.
To download, try ...
Bloodshed Dev-C++ |
|
Turbo C was a Borland Integrated Development Environment and compiler for the C programming language. It was first introduced in 1987 and was noted for its integrated development environment, small size, extremely fast compile speed, comprehensive manuals and low price.
To download, try these...
Turbo C++ version 1.01
Turbo C 2.01 |
|
Borland C++ Builder is a popular rapid application development (RAD) environment produced by the CodeGear subsidiary of Borland for writing programs in the C++ programming language.
|
 |
|
How to compile a file in Microsoft Visual C++ |
|
|
In the university labs, the Microsoft Visual Studio 2005 is already installed. Therefore, I will show how to use this tool in order to compile a C++ file.
To start, click Start>All Programs>Microsoft Visual Studio 2005>Microsoft Visual Studio 2005
To set C++ to default, click Tool> Import and Export Settings> Reset all setings> Next> No> Next> Finish
To create a project, click File> New >Project (shortcut Crtl,Shift,N).In the Templates list of the New Project
dialog box, you have two options:
- You can click Win32 Console Application, give it a name in
the Name text box and possibly click OK. You can then click Finish. In
this case, the studio would create a few files for you and write default
code in them.
- You can click Win32 Console Application, give it a name in
the Name text box and possibly click OK. You can then click Next. In the
second page, click the Empty Project check box and click Finish. To
create a source file, on the main menu, you can click Project -> Add
New Item..., select C++ File, give it a name, and click OK. You would
then have to write the necessary code.
To compile that file, press F5 or click Tool, Start Debugging.
Please note
- C++ files:
- Header file (.h or .hpp file)
- Source file (.cpp or .c file)
- Application must a source file that contains main() method.
- instead:
#include <iostream.h>
Type:
  #include <iostream>
  using namespace std;
This is an example:
#include <iostream>
using namespace std;
int f( int x )
{
if( x == 0 )
return 0;
else
return 2 * f( x - 1 ) + x * x;}
int main( )
{
cout << "f(5) = " << f( 5 ) << endl;
return 0;
} |
|
For more detail, how to do with Visual Studio... |
|
|
In Visual Studio, every file is stored in a project. This means that every document, folder, code file
(.cpp) and compiled code (.exe) has to be contained by a project. So, the first step before programming using Visual Studio
is to understand the Visual Sudio environment.
It is necessary to create a new project to develop a new C++ program, but also to edit existing code
(i.e., a .cpp file stored inside a usb jump drive). To create a new project select from the main menu line "File > New > Project ....".
or short-cut Ctrl,Shift,N
|
|
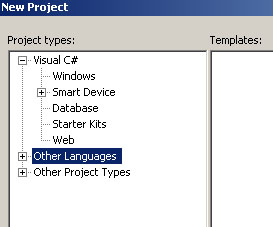
There are various kinds of programming languages in Visual Studio: C++,C#,VB,J#,ASP.Net,etc..
In the scope of C++ programming for Data Structure, I will show how to create a C++ project.
So, select Other languages if your default language is not Visual C++
|
|
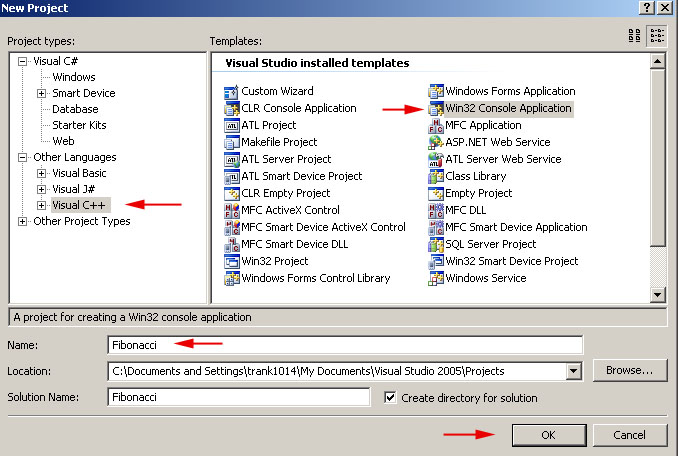
Select Visual C++, in the right window, select Win32 Console Application
After this, you should specify a new name for your project. For example,
I name my project is Fibonacci.
|
|
After that, select Next...
|
|
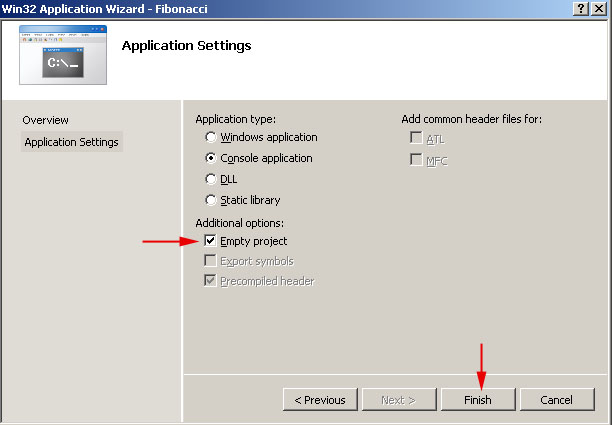
Select Empty..., then click Finish, so a new project is created.
|
|
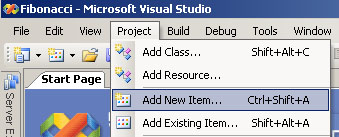
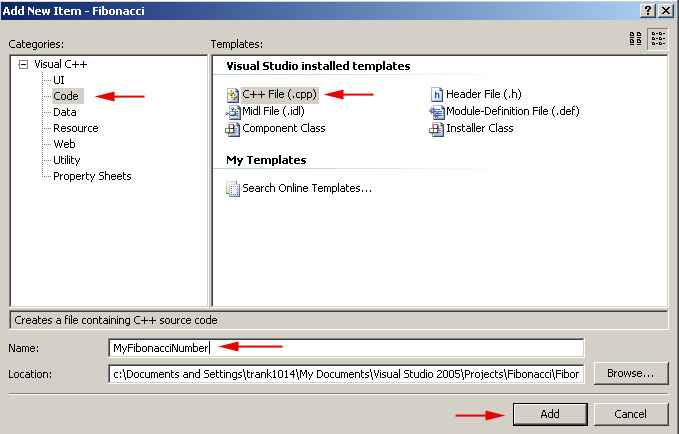
If you want to make a new file(.cpp,.h,etc.),Select Project in menu bar and Add New Item....
|
|
In categories, select Code. In Templates, select C++ File. Type the name of C++ file in Name field. Then Click Add.
|
|
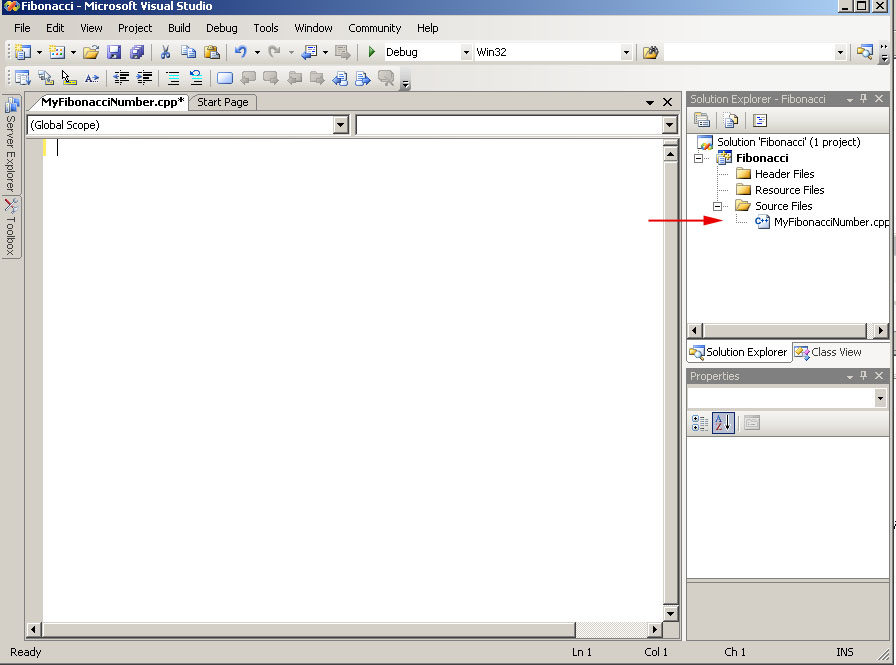
At this time, you're free to enter your code...
|
|
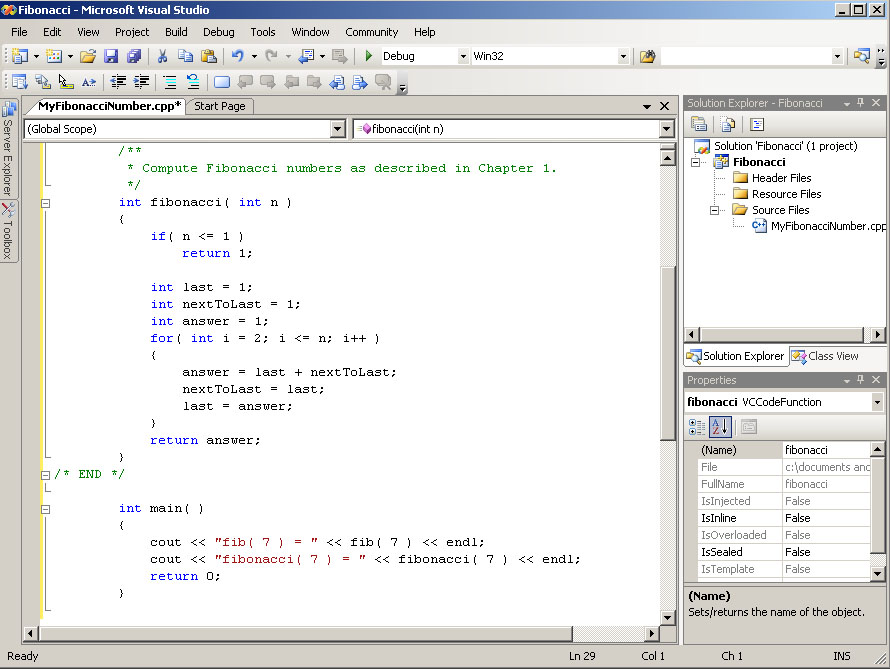
For example, I wil enter Fibonacci number code
|
|
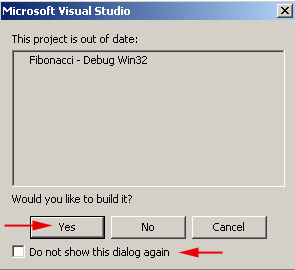
At this point, I want to compile my code, I press F5, or Click the green triangle in the bar or select Debug, Start Debugging...
|
|
A popup diaglog ask me that I want build that project or not. Just click Yes.
|
|
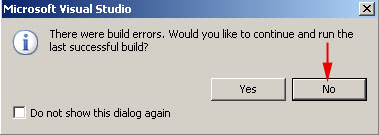
If your program does not have any error, it is built. In my case, my code has error,
a message pops up... Just click No.
|
|
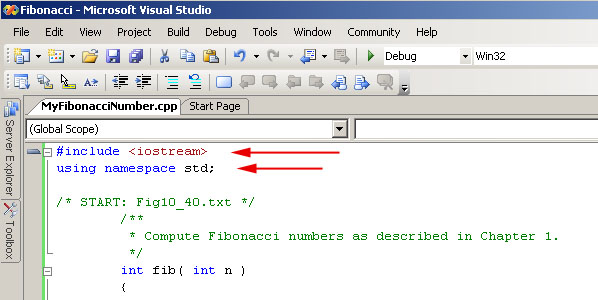
A Error list window opens and shows how many error I have, location of that error, and the description of that error.
In my code, as I mentioned in the note above, Visual C++ doesn't accept iostream.h like other IDE, I will correct that code by double click the
message in error list.
|
|
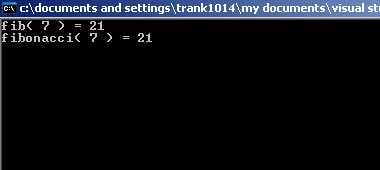
No error. A console window will pop up.
|
|
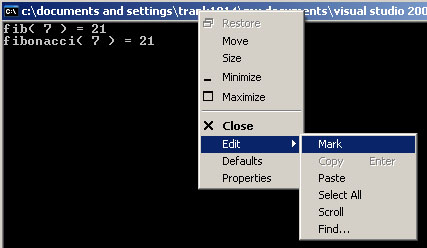
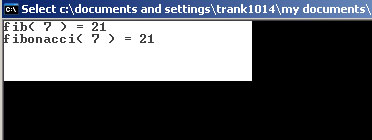
Then, I want to copy those value to my assignment in MS Word, right click the title bar, select Edit, Mark, use the mouse to select what you want to copy, press Enter... then paste it in your MS Word document.
|
|
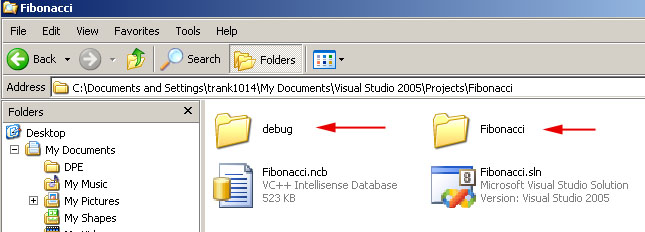
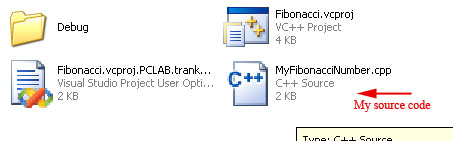
OK, so you may ask where my files did store. Obviously, your files stored in the project folder. My case, the Fibonacci project and MyFibonacciNumber.cpp in Fibonacci folder and the excutable file (.exe) in debug folder.
|
|
How to debug with Visual Studio... |
|
|
Debugging a program is extremely important. So, I will talk a little bit about debugging.
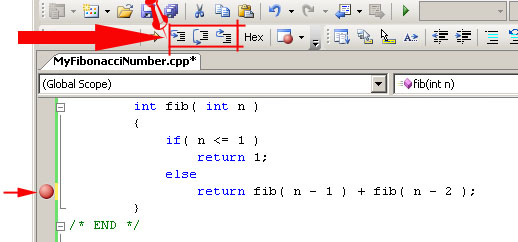
I will use the program MyFibonacciNumber.cpp as example.
To set a breakpoint at a specific line, press F9. (Breakpoints tell the debugger that an application should break, pause execution, at a certain point.)
|
 |
|
In above figure, I highlight 3 important buttons. From left to right, they are Step Into (F11), Step Over (F10), Step Out (Shift-F11).
In order to explain more clearly, you must know "Stepping is the process of running one statement at a time".
To step through code one statement at a time, choose Step Into from the Debug menu (F11), or press the left button.
Step Into
When stepping into a procedure, Visual C++ executes the current statement and then enters Break mode. You can now edit any code and use the debugging tools. If the statement executed
calls another procedure, Visual C++ will step into that procedure. Once you have stepped through all the statements in that procedure, Visual C++ will jump back to the next statement
of the procedure it was called from. To go onto the the next statement, press the Step Into (F11) button again. If you press the play button (F5) code execution will continue as normal.
Step Over
Step Over is the same as Step Into, except that when it reaches a call for another procedure, it will not step into the procedure. The procedure will run, and you will be brought to the next statement in the current procedure.
To step through code one statement at a time, choose Step Over from the Debug menu (F10), or press the middle button.
Step Out
If you are using Step Into and have been moved to a called procedure, you can automattically run the current procedure, and return to the procedure it was called from by pressing the Step Out (Shift+F11) on the Debug menu, or pressing the right button.
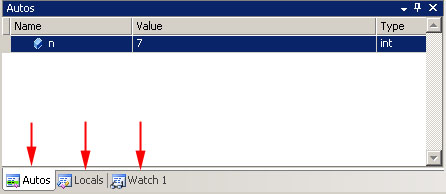
There are 3 important windows: autos, locals, and watch. (you can open it by selecting Debug, Windows, Autos/Locals/Watch)
|
 |
|
Updated Wednesday, June 27, 2007.
|
|