Purpose: This
application demonstrates how to create and import Java
packages in JDK and NetBeans, respectively.
Main.java (This
file is to be placed in a folder named pkg1.)
// Main.java
package pkg1;
public class Main {
// intVariable
is declared as package-private (without modifier)
int
intVariable;
public
void setIntVariable (int value) {
intVariable = value;
}
public
int getIntVariable () {
return intVariable;
}
}
Main2.java (This
file is to be placed in a folder named pkg2.)
//Main2.java
package pkg2;
import pkg1.Main;
public class Main2 {
public
static void main(String[] args) {
Main
objMain = new Main();
objMain.setIntVariable(100);
System.out.println("\n>>>>>>>>
main() in Main2:");
System.out.printf("objMain.intVariable:
%s\n", objMain.getIntVariable());
} //main
} // class
Note: We assume both pkg1 and pkg2 are
placed under the folder C:\Documents and
Settings\Yang\My Documents\Java.
Replace the name of this folder with the
name of the folder where you have placed the pkg1 and pkg2 folders.
B. Running the application using
JDK:
1. Use javac to compile both Java programs.
2. If you try to run the Main2 application using the ��java Main2�� command, the following error message will appear.
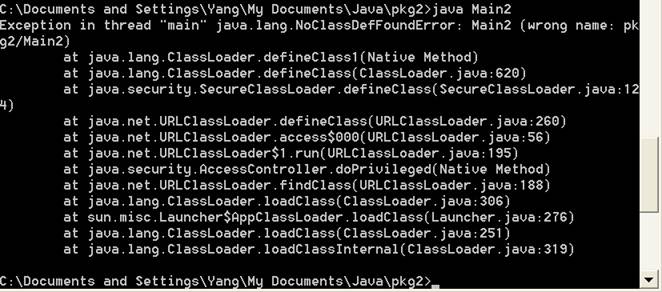
Reason? The Java loader tried to load Main2.class in the pkg2 package but was not able to find it in those folders as specified in the CLASSPATH environment variable. That is, the folder C:\Documents and Settings\Yang\My Documents\Java is not part of CLASSPATH.
3. To fix the CLASSPATH, there exist three alternative methods.
a) Mehtod1: Set the environment variable CLASSPATH to include the folder where pkg1 and pkg2 are located. Note: You need to be a system admin to do this. More information about this and other methods can be found at http://download.oracle.com/javase/1.3/docs/tooldocs/win32/classpath.html.
b) Mehtod2: Use the set classpath command. Note: This is good for that command prompt until it exits.
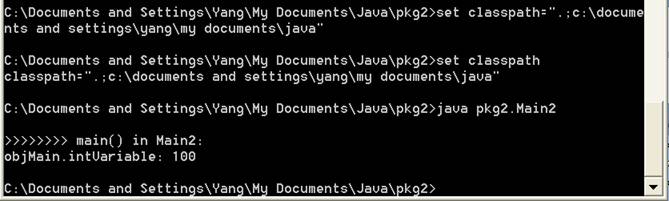
c) Mehtod3: Use the �Cclasspath option with Java command. Note: This is only good for that particular command.

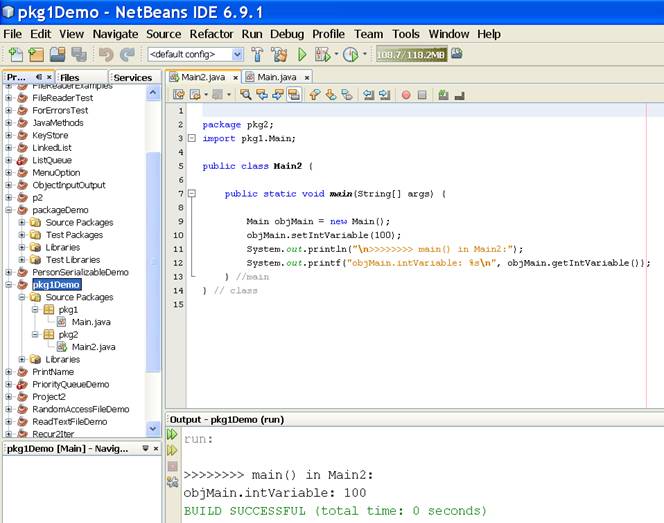
C. Running the application using NetBeans:
1. An easy way to test these two files in NetBeans is to create a new folder and place both pkg1 and pkg2 in that folder.
2. Both folders can then be included as the source packages of a new project.
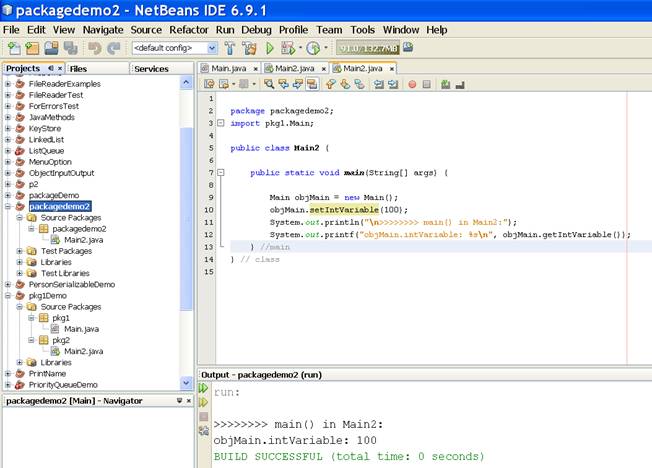
3. The figure below shows a sample output of running this application.
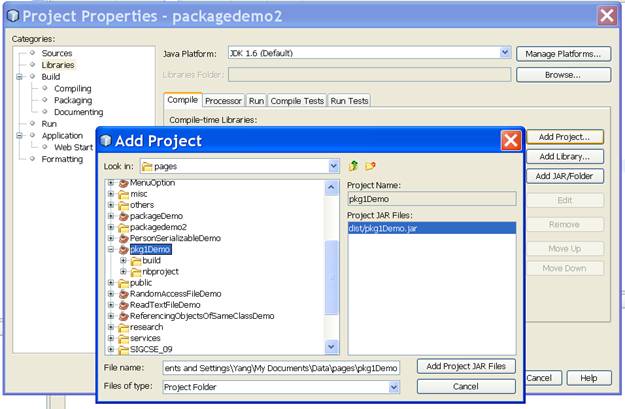
4. Now if you��ve created a new project called packagedemo2, into which you��d like to import pkg1.Main.
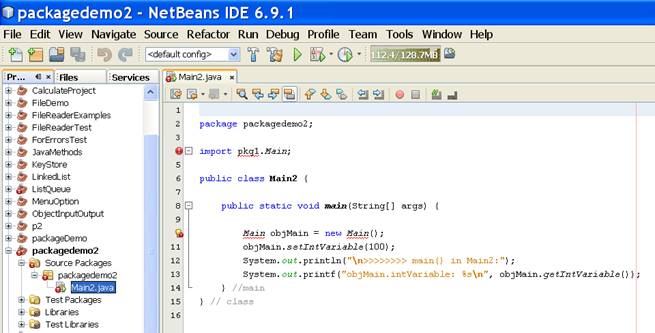
5. As shown above, NetBeans does not recognize the pkg1 package in the import statement.
6. To fix this problem, add the project pkg1Demo into the Libraries property of the new project packagedemo2.
7. A sample output of running the new project is shown below.
1. http://download.oracle.com/javase/tutorial/java/package/createpkgs.html Creating a Package
2. http://www.jarticles.com/package/package_eng.html Java Package Tutorial
3. http://netbeans.org/kb/docs/java/quickstart.html NetBeans IDE Java Quick Start Tutorial
4. http://netbeans.org/nonav/kb/docs/java/project-setup.html#ide-projects Creating, Importing, and Configuring Java Projects
5. http://download.oracle.com/javase/1.3/docs/tooldocs/win32/classpath.html Setting the class path